既有适合小白学习的零基础资料,也有适合3年以上经验的小伙伴深入学习提升的进阶课程,涵盖了95%以上大数据知识点,真正体系化!
由于文件比较多,这里只是将部分目录截图出来,全套包含大厂面经、学习笔记、源码讲义、实战项目、大纲路线、讲解视频,并且后续会持续更新
需要这份系统化资料的朋友,可以戳这里获取
// count_action.js文件,该文件专门为Count组件生成action对象 import { INCREMENT,DECREMENT } from “./constant” import store from ‘…/redux/store’ // 完整书写 export const createIncrementAction = (data)=>{ return {type:INCREMENT,data} } // 精简书写 export const createDecrementAction = data => ({type:DECREMENT,data}) // 异步的action export const createIncrementAsyncAction = (data,time) =>{ // 函数柯里化,将函数的返回值暴露出来 return () =>{ setTimeout(()=>{ store.dispatch(createIncrementAction(data)) },time) } }
我们在调用函数的时候,直接传入具体实参即可:

而我们在调用这个异步任务后,控制台爆出如下错误: 其告诉我们action只能接收对象不能接收函数,如果要接收函数需要使用第三方中间件,并且名字在控制台也告诉了我们:**redux-thunk**

npm安装完 redux-thunk之后,在store文件中引入并使用即可,如下:
// store.js文件,该文件专门用于暴露一个store对象,整个应用只有一个store对象 // 切换 legacy_createStore 模式导出的 API,此种模式下没有(警告)@deprecation标签。 import { legacy_createStore as createStore,applyMiddleware } from “redux”; // 引入处理count的reducer import countReducer from ‘./countReducer.js’ // 引入redux-thunk,用于支持异步action import thunk from ‘redux-thunk’
// 暴露store export default createStore(countReducer,applyMiddleware(thunk))
**注意**:异步action不是必须要写的,完全可以自己等待异步任务的结果然后再去分发同步action。当我们想要对状态进行操作,但是具体的数据靠异步任务返回的时候可以采用异步action。
### react-redux的使用
facebook公司发现,许多的react开发人员都倾向于使用redux进行集中式状态管理,所以其公司自行推出了react-redux插件库,便于react和redux进行协调开发,react-redux模型图如下:
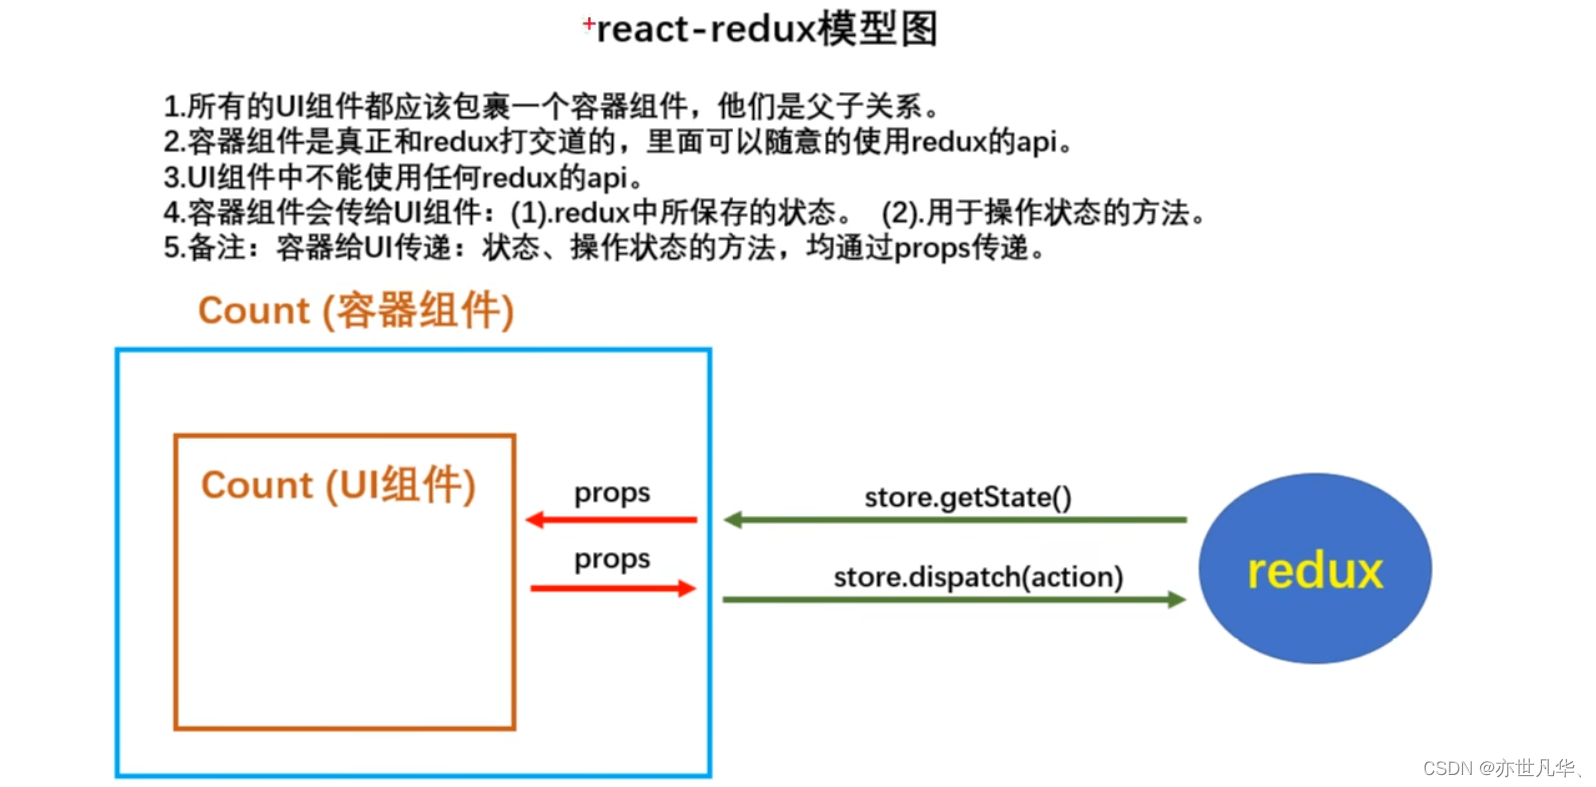
根据原理图,我们还需要创建一个容器组件,将以前直接在UI组件库里面调用redux的API进行抽离出来,所有与redux相关的API全部放置在容器组件中进行,如下:
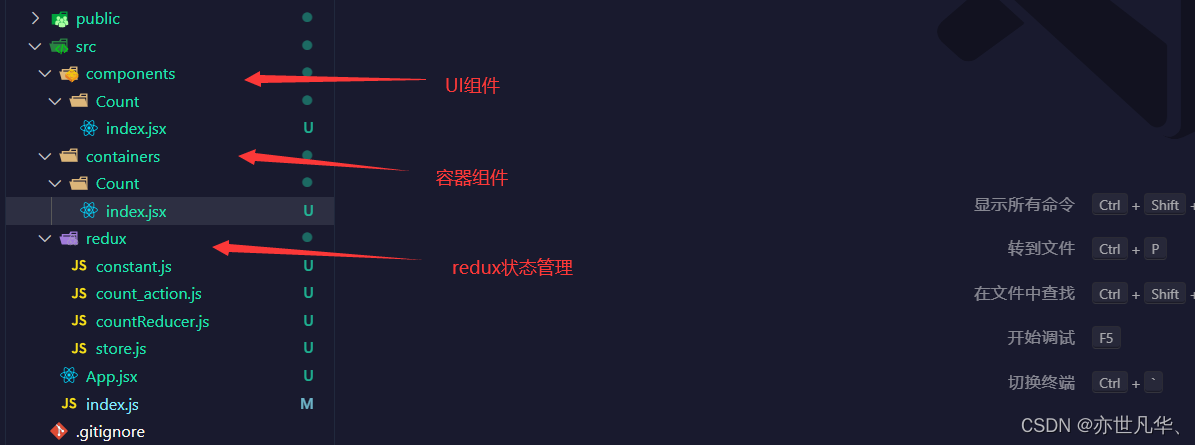
在书写容器组件代码之前,需要npm安装一下react-redux这个包,安装完成之后,我直接给出以下代码,用容器组件来连接UI组件,如下:
// 引入Count的UI组件 import CountUI from ‘…/…/components/Count’ import { createIncrementAction,createDecrementAction,createIncrementAsyncAction } from ‘…/…/redux/count_action’
// 引入connect用于连接UI组件于redux import { connect } from ‘react-redux’
/* 1.mapstateToProps函数返回的是一个对象; 2.返回的对象中的key就作为传递给UI组件props的key, value就作为传递给UIT组件props的value 3.mapStateToProps用于传递状态 / function mapStateToProps(state){ return {count:state} } / 1.mapDispatchToProps函数返回的是一个对象; 2.返回的对象中的key就作为传递给UI组件props的key, value就作为传递给UI组件props的value 3.mapDispatchToProps用于传递操作状态的方法 */ function mapDispatchToProps(dispatch){ return { jia:(number)=>{dispatch(createIncrementAction(number))}, jian:(number)=>{dispatch(createDecrementAction(number))}, jiaAsync:(number,time)=>{dispatch(createIncrementAsyncAction(number,time))} } }
// 使用connect()()创建并暴露一个Count的容器组件 export default connect(mapStateToProps,mapDispatchToProps)(CountUI)
当然这个容器组件也可以采用简写方式,因为react-redux这个第三方库会自动帮助我们分发任务所以我们不需要在写dispatch,因为是函数传参,函数也能直接用箭头函数写在参数上:
// 引入Count的UI组件 import CountUI from ‘…/…/components/Count’ import { createIncrementAction,createDecrementAction,createIncrementAsyncAction } from ‘…/…/redux/count_action’
// 引入connect用于连接UI组件于redux import { connect } from ‘react-redux’
/* 1.mapstateToProps函数返回的是一个对象; 2.返回的对象中的key就作为传递给UI组件props的key, value就作为传递给UIT组件props的value 3.mapStateToProps用于传递状态 / // function mapStateToProps(state){ // return {count:state} // } // 简写 // const mapStateToProps = state => ({count:state}) / 1.mapDispatchToProps函数返回的是一个对象; 2.返回的对象中的key就作为传递给UI组件props的key, value就作为传递给UI组件props的value 3.mapDispatchToProps用于传递操作状态的方法 */ // function mapDispatchToProps(dispatch){ // return { // jia:(number)=>{dispatch(createIncrementAction(number))}, // jian:(number)=>{dispatch(createDecrementAction(number))}, // jiaAsync:(number,time)=>{dispatch(createIncrementAsyncAction(number,time))} // } // } // 简写 // const mapDispatchToProps = dispatch => ({ // jia:(number)=>{dispatch(createIncrementAction(number))}, // jian:(number)=>{dispatch(createDecrementAction(number))}, // jiaAsync:(number,time)=>{dispatch(createIncrementAsyncAction(number,time))} // })
// 使用connect()()创建并暴露一个Count的容器组件 export default connect( state => ({count:state}), // dispatch => ({ // jia:(number)=>{dispatch(createIncrementAction(number))}, // jian:(number)=>{dispatch(createDecrementAction(number))}, // jiaAsync:(number,time)=>{dispatch(createIncrementAsyncAction(number,time))} // }) // 因为react-redux会帮助我们自动分发dispatch { jia:createIncrementAction, jian:createDecrementAction, jiaAsync:createIncrementAsyncAction } )(CountUI)
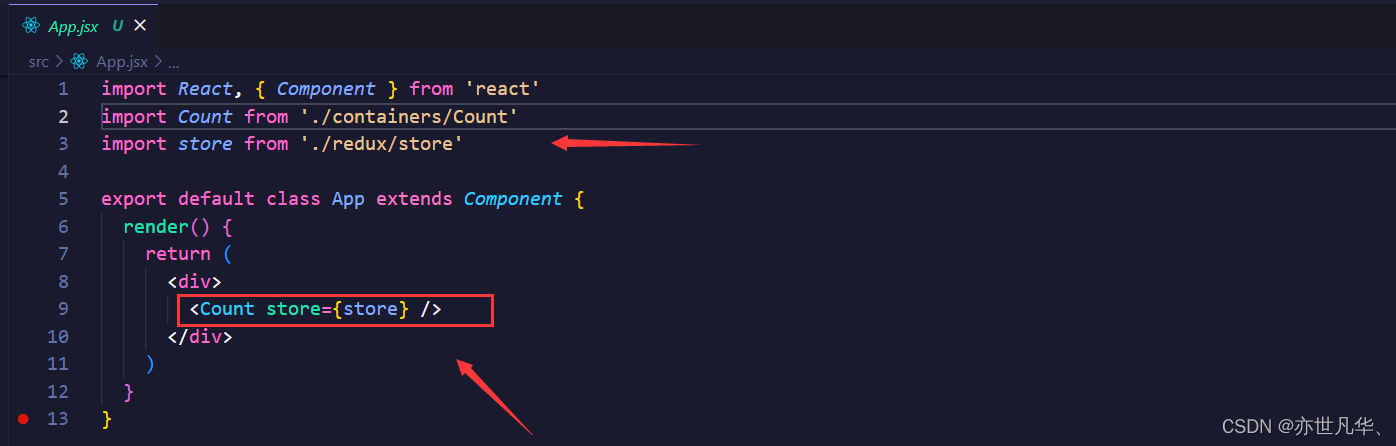
因为UI组件是被容器组件给包裹住的,所有需要我们在App.jsx中引入容器组件而不是UI组件,并且需要我们在容器组件中以props的形式传入store对象,以此来在容器组件中能使用store的API:
那如果容器组件如果有很多的情况下,每个容器组件都需要props传入store未免有些太过繁琐了,这里我们可以借助 Provider 组件来一次性处理所有问题,如下:

根据以上的操作,我们在UI组件中就不需要来进行redux中store相关API的书写了,直接书写容器组件中定义的操作状态的方法即可,如下:
import React, { Component } from ‘react’ export default class Count extends Component {
increment = () =>{ const {value} = this.selectNumber // 通过dispatch来分配任务 this.props.jia(value1) } decrement = () =>{ const {value} = this.selectNumber this.props.jian(value1) } incrementIfOdd = () =>{ const {value} = this.selectNumber if(this.props.count % 2 !==0){ this.props.jia(value1) } } incrementAsync = () =>{ const {value} = this.selectNumber this.props.jiaAsync(value1,500) } render() { // console.log(this.props); return (
当前求和为:{this.props.count}
1
2
3
+
-
当前求和为奇数再加
异步加
)
}
}
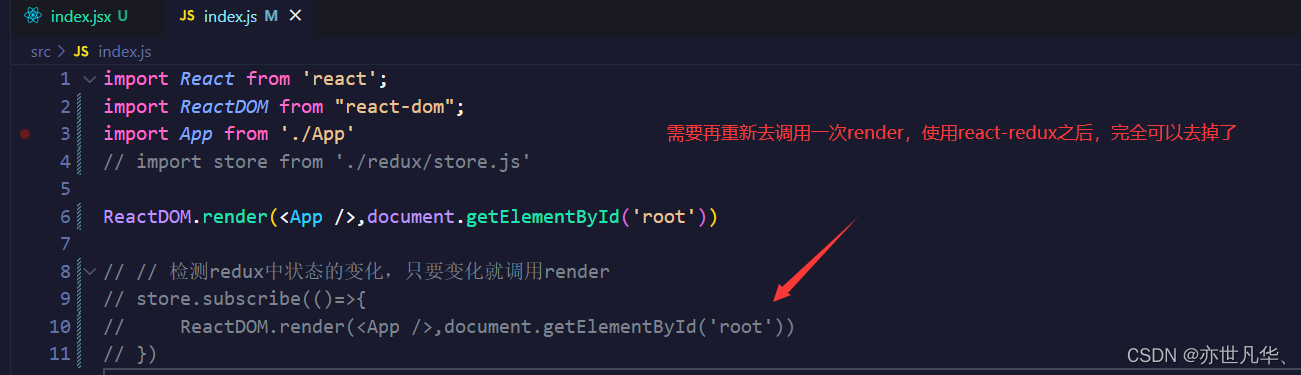
有了容器组件的出现,传统的需要在强制去调用render刷新页面已经不在需要了,如下:
写到这大家可能会有点疑惑,如果我们要是有20UI组件的话,是不是还需要写20个容器组件,这样不是导致我们的文件数过大吗,没错是这样,那么有什么办法来解决呢,其实我们完全可以将容器组件和UI组件整合在一起,因为react-redux并没有禁止我们将这两个组件写成一个啊,所有我们将之前的UI组件代码粘贴到容器组件中,如下:(完全没问题)
// 引入Count的UI组件 import { createIncrementAction,createDecrementAction,createIncrementAsyncAction } from ‘…/…/redux/count_action’ // 引入connect用于连接UI组件于redux import { connect } from ‘react-redux’
import React, { Component } from ‘react’
class Count extends Component {
increment = () =>{ const {value} = this.selectNumber // 通过dispatch来分配任务 this.props.jia(value1) } decrement = () =>{ const {value} = this.selectNumber this.props.jian(value1) } incrementIfOdd = () =>{ const {value} = this.selectNumber if(this.props.count % 2 !==0){ this.props.jia(value1) } } incrementAsync = () =>{ const {value} = this.selectNumber this.props.jiaAsync(value1,500) } render() { // console.log(this.props); return (
当前求和为:{this.props.count}
1
2
3
+
-
当前求和为奇数再加
异步加
)
}
}
// 使用connect()()创建并暴露一个Count的容器组件 export default connect( state => ({count:state}), { jia:createIncrementAction, jian:createDecrementAction, jiaAsync:createIncrementAsyncAction } )(Count)
当我们要进行多组件的redux集中状态管理怎么办,要知道我们之前书写store的时候,只传入一个组件的,如果要进行多组件的redux需要借助redux的一个API,combineReducers用于管理多个组件并将其封装成一个对象,如下:
// store.js文件,该文件专门用于暴露一个store对象,整个应用只有一个store对象 // 切换 legacy_createStore 模式导出的 API,此种模式下没有(警告)@deprecation标签。 import { legacy_createStore as createStore,applyMiddleware,combineReducers } from “redux”; // 引入处理count的reducer import countReducer from ‘./reducers/count.js’ // 引入处理person的reducer import personReducer from “./reducers/person.js”; // 引入redux-thunk,用于支持异步action import thunk from ‘redux-thunk’
// 将所有的容器组件合并成一个对象 const allReducer = combineReducers({ count:countReducer, person:personReducer })
// 暴露store export default createStore(allReducer,applyMiddleware(thunk))
当我们书写多个组件进行redux的时候,还需要书写其actions和reducers文件,已经其容器组件和UI组件合并的文件:
**actionCreators文件**:

**Reducers文件**:
import {ADD_PERSON} from ‘…/constant’
// 初始化人的列表 const initState = [{id:‘001’,name:‘tom’,age:18}]
export default function personReducer(preState=initState,action){ const {type,data} = action switch (type){ case ADD_PERSON: return [data,…preState] default: return preState } }
**Person组件**:
import { nanoid } from ‘nanoid’ import React, { Component } from ‘react’ import {connect} from ‘react-redux’ import { createAddPersonAction } from ‘…/…/redux/actions/person’
class Person extends Component { addPerson = () =>{ const name = this.nameNode.value const age = this.ageNode.value const personObj = {id:nanoid(),name,age} if(this.nameNode.value.trim() === ‘’ || this.ageNode.value.trim() === ‘’) return alert(‘输入不能为空!’) this.props.addperson(personObj) this.nameNode.value = ‘’ this.ageNode.value = ‘’ } render() { return (
我是Person组件
上方组件求和为:{this.props.count}
this.nameNode = c} type=“text” placeholder=‘请输入姓名’ />
this.ageNode = c} type=“text” placeholder=‘请输入年龄’ />
点击添加个人信息
{
this.props.person.map(§=>{
return
姓名:–{p.name},年龄:–{p.age} })
}
)
}
}
export default connect( // 通过store文件,拿到其任何组件的状态 state => ({person:state.person,count:state.count}),// 映射状态 { addperson:createAddPersonAction// 映射状态的方法 } )(Person)
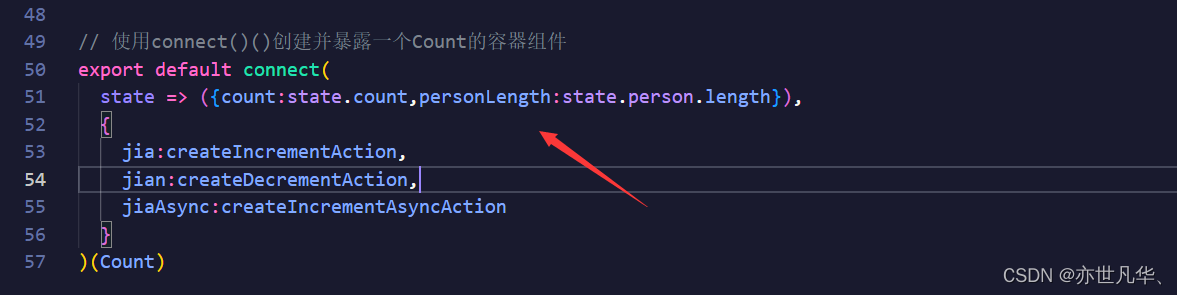
通过redux的状态是共享的,我们在Count组件中拿到Person组件中的状态,并将其状态的数组长度打印到页面:
>
> 总结
>
>
> **明确两个概念**:
> 1)UI组件:不能使用任何redux的api,只负责页面的呈现、交互等。
>
>
> 2)容器组件:负责和redux通信,将结果交给UI组件。
> **如何创建一个容器组件**:
>
>
> 靠react-redux 的connect函数,connect(mapStateToProps,mapDispatchToProps)(UI组件)
>
>
> mapstateToProps:映射状态,返回值是一个对象
> mapDispatchToProps:映射操作状态的方法,返回值是一个对象
> **备注**:容器组件中的store是靠props传进去的,而不是在容器组件中直接引入
>
>
> mapDispatchToProps也可以是一个对象
>
>
> 容器组件的UI组件可以整合成一个文件
>
>
>
### redux开发者工具的安装与使用
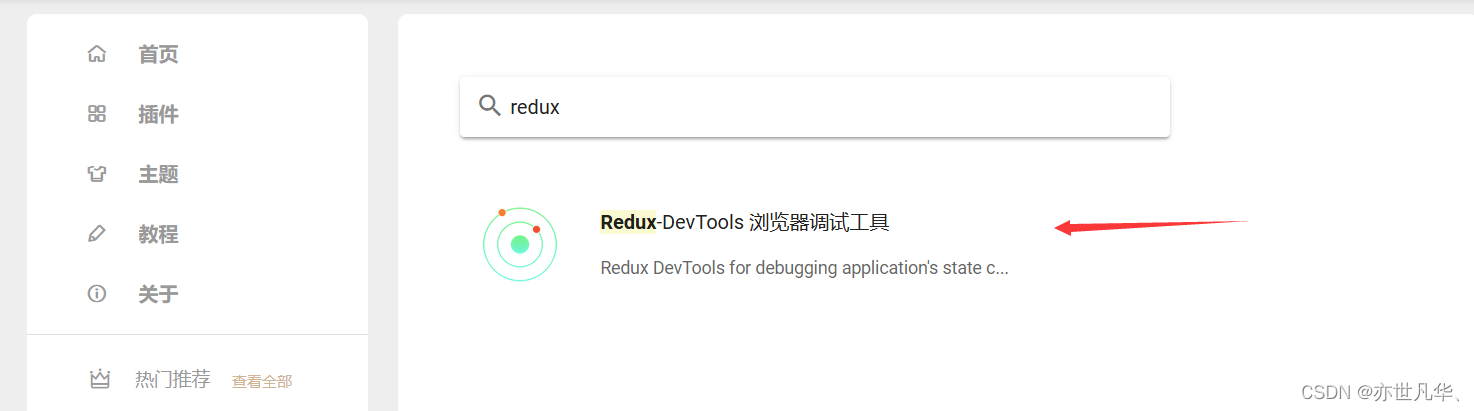
对于有条件的朋友,可以直接访问谷歌浏览器的网上商店,搜索redux找到其开发工具进行下载即可,而没条件的朋友可以访问:[极简插件](https://bbs.csdn.net/topics/618545628) 。搜索redux,如下:
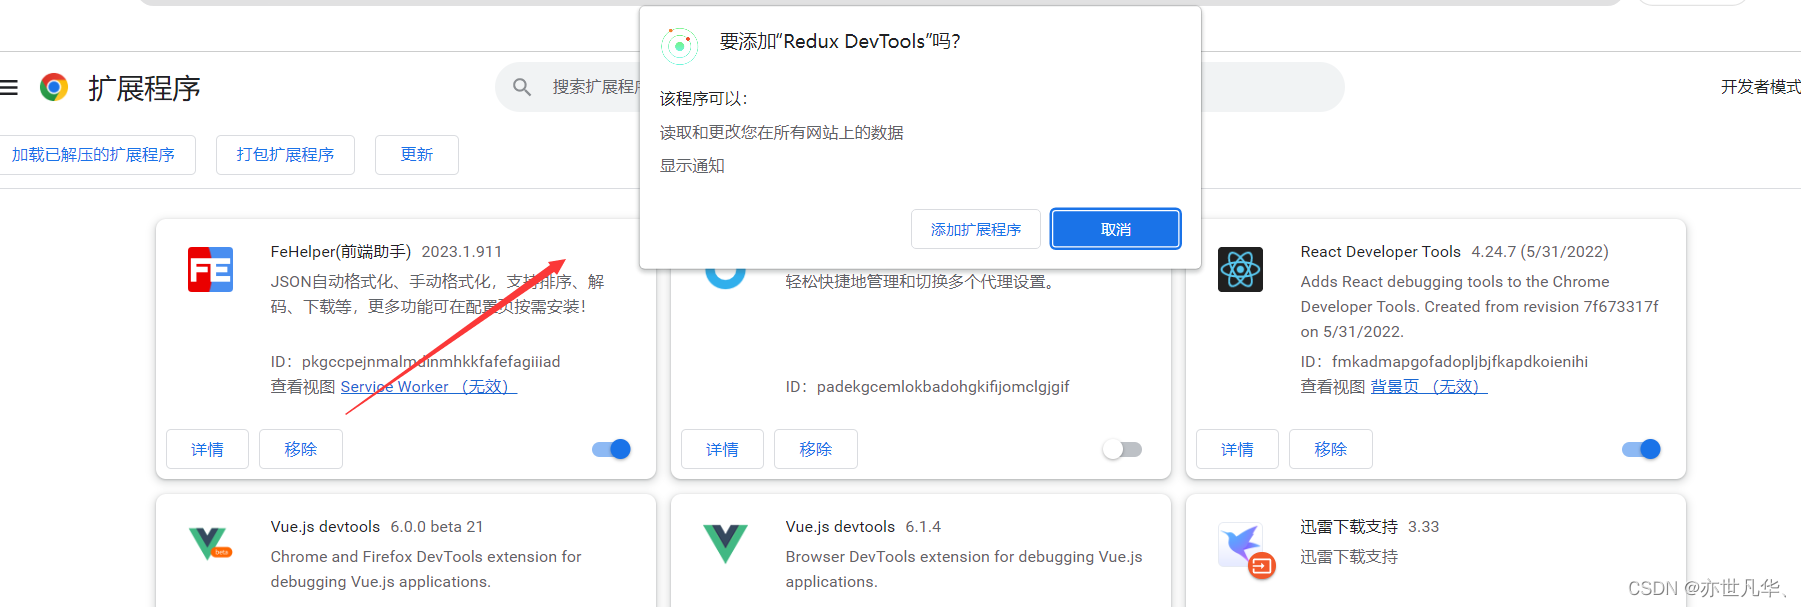
下载并解压,将后缀名为CRX的文件,直接拖到谷歌浏览器的扩展程序页面,如下:
当然安装之后是并不能直接使用的,还需要进行一些操作,如下:
编辑器新建终端执行如下命令,安装第三方库:
npm install redux-devtools-extension
安装完成之后,需要在store文件中导入并引用,如下:

安装如上配置好之后,就可以使用redux开发者工具了,如下:
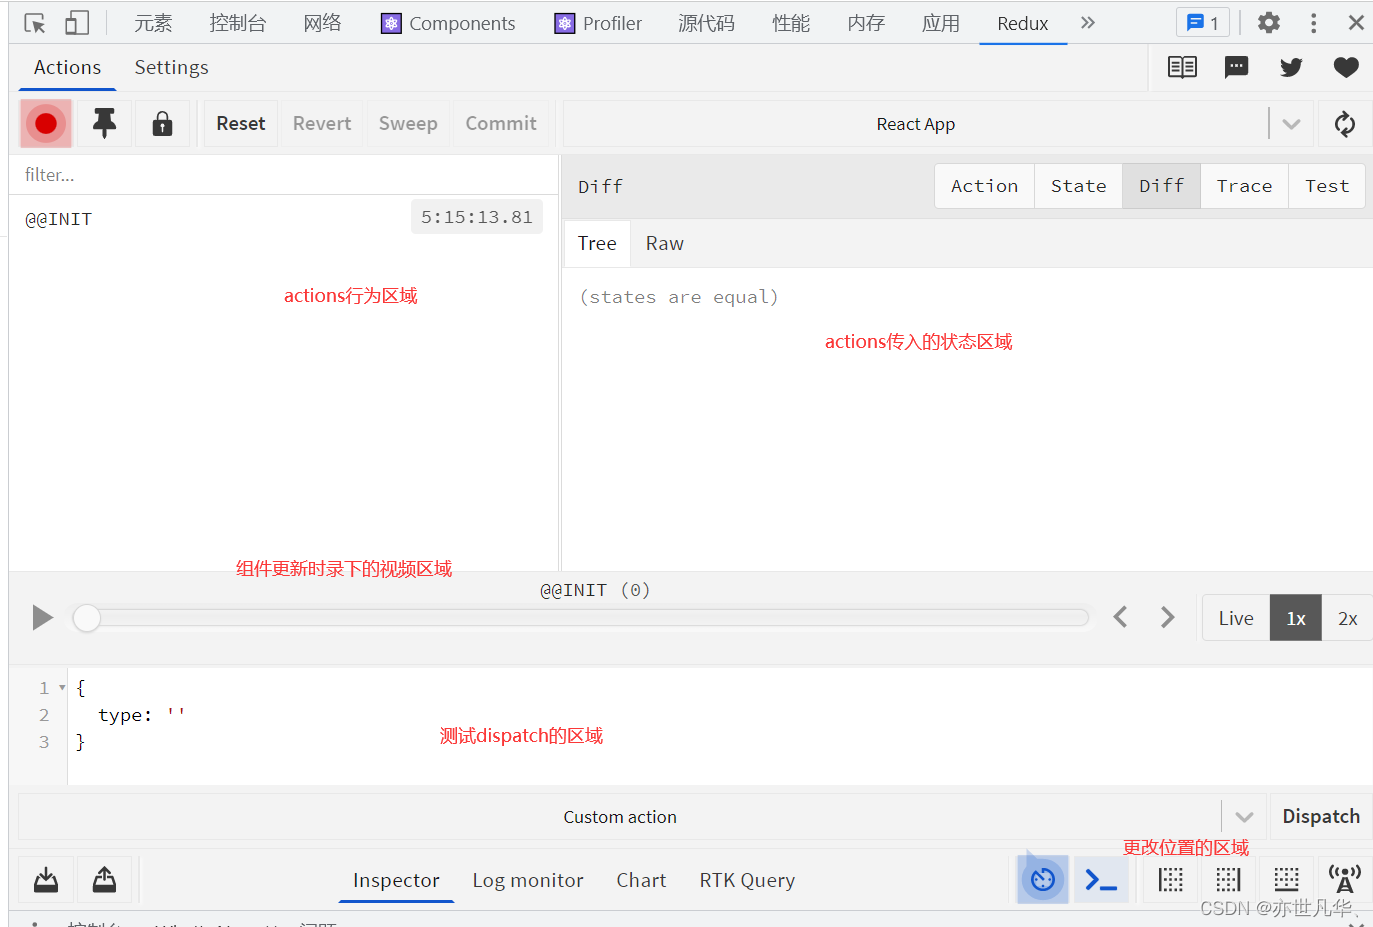
当然还有一些其他的功能,就不再一一讲解了,感兴趣的朋友可以去试一下。
### Redux Toolkit的使用讲解
Redux Toolkit 是我们官方推荐的编写 Redux 逻辑的方法。它围绕 Redux 核心,并包含我们认为对于构建 Redux 应用必不可少的软件包和功能。Redux Toolkit 建立在我们建议的最佳实践中,简化了大多数 Redux 任务,防止了常见错误,并使编写 Redux 应用程序更加容易。
Redux Toolkit如何使用以及其存在的优势,官方已经讲解的很清楚了,其中文官方网址:[网址](https://bbs.csdn.net/topics/618545628) 。现在博主就简单做一个小demo给大家示例一下,如果是已经存在的项目想要使用redux toolkit可以安装第三方包:
NPM
npm install @reduxjs/toolkit
Yarn
yarn add @reduxjs/toolkit
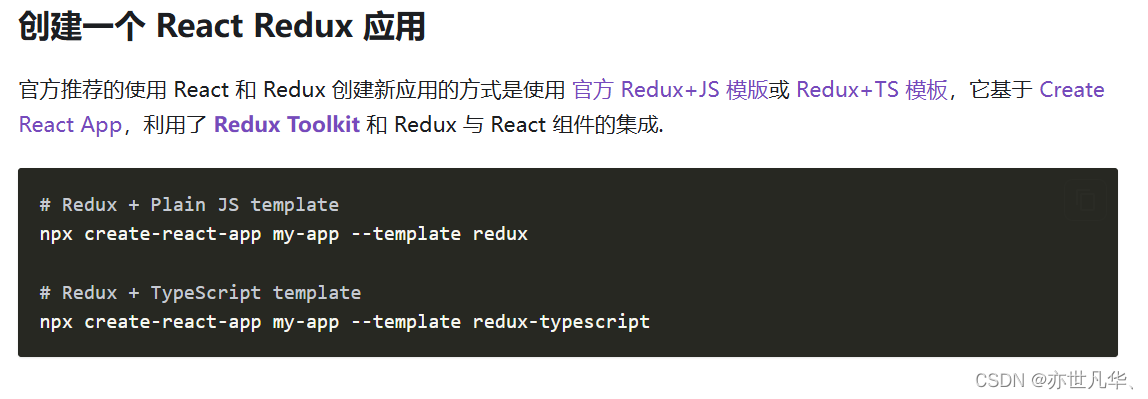
如果是新建一个项目且要使用redux toolkit的话,安装脚手架的时候在后面添加如下命令即可:
创建store文件与之间的API不同,如下:
import { configureStore } from “@reduxjs/toolkit”; import counter from ‘./reducers/count’
export default configureStore({ // 需要在store文件中对reducer文件进行一个挂载 reducer:{ counter } })
创建处理Count组件的reducer文件:
import { createSlice } from “@reduxjs/toolkit”;
const counter = createSlice({
网上学习资料一大堆,但如果学到的知识不成体系,遇到问题时只是浅尝辄止,不再深入研究,那么很难做到真正的技术提升。
需要这份系统化资料的朋友,可以戳这里获取
一个人可以走的很快,但一群人才能走的更远!不论你是正从事IT行业的老鸟或是对IT行业感兴趣的新人,都欢迎加入我们的的圈子(技术交流、学习资源、职场吐槽、大厂内推、面试辅导),让我们一起学习成长!
export default configureStore({ // 需要在store文件中对reducer文件进行一个挂载 reducer:{ counter } })
创建处理Count组件的reducer文件:
import { createSlice } from “@reduxjs/toolkit”;
const counter = createSlice({
[外链图片转存中…(img-d15k2F0C-1714976049973)] [外链图片转存中…(img-uF39PVmw-1714976049973)]
网上学习资料一大堆,但如果学到的知识不成体系,遇到问题时只是浅尝辄止,不再深入研究,那么很难做到真正的技术提升。
需要这份系统化资料的朋友,可以戳这里获取
一个人可以走的很快,但一群人才能走的更远!不论你是正从事IT行业的老鸟或是对IT行业感兴趣的新人,都欢迎加入我们的的圈子(技术交流、学习资源、职场吐槽、大厂内推、面试辅导),让我们一起学习成长!
好文阅读
本文由 用户 于 2024-06-07 发布在 夸智网,如有疑问,请联系我们。
本文链接:https://www.kuazhi.com/post/713981899.html
发表评论